자마린에서 백그라운드서비스를 실행한는 방법을 정리해 보겠습니다.
우선 최종 실행 형태 입니다.
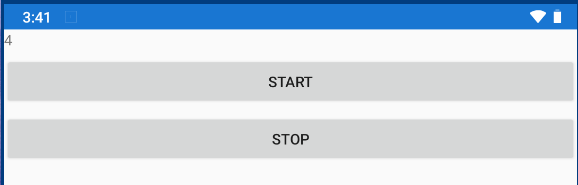
START를 누르면 0부터 int.max까지 for문을 돌면서 lbl에 출력하게 됩니다.
이때 눈으로 확인하기 위해서 for문에 1초 딜레이를 줍니다.
그러면 1초에 한번씩 숫자가 오래는데 background서비스를 이용하면 앱을 종료하더라도 디바이스에서 해당 연산을 계속하게 되어 프로그램을 다시 실행하더라도 저 숫자는 다시 켰을 때 0부터 시작이아니라 계속 이어서 출력하게 되는거죠
우리가 브라우저에서 다운로드를 하고 브라우저를 종료하더라도 다운로드는 계속 받게되는것과 일치합니다.
우선 이 방법을 알기 전에 자마린의 MessgingCenter를 알아야 합니다 서로 통신을 하게되는 객체이죠 이 메세징센터를 통해서 공통 코드에서 안드로이드쪽에 백그라운드 요청을 할 수 있게 됩니다.
예
//발송
var message = new StartTask();
MessagingCenter.Send(message, "Start");

//구독
MessagingCenter.Subscribe<StartTask>(this, "Start", message => {
  Log.Info("Service","Service Start!!" + message.ToString());
  var intent = new Intent(this, typeof(CountService));

  StartService(intent);
});
해당 메시지센터의 메시지 발송시 첫번째 인자로는 넘길값, 두번째 인자로는 구독 토픽을 하게 됩니다.
메시지 센터의 특징은 해당 토픽에 메시지를 구독하고 있든 아니든 상관없이 해당 토픽으로 무조건 발송하게 되고 이 토픽을 위의 예제와 같이 구독하고 있으면 해당 이벤트가 넘어오게 됩니다. 3번째 인자로 넣어준 액션을 실행하게 되는거죠
예제는 버튼에서 백그라운드 시작을 요청하면(사용자가) 안드로이드 코드에서 이 신호를 받아서 서비스 인텐트를 실행하게 되는겁니다.
Android.MainActivity.cs 코드 (자마린을 구동하는 프로젝트중에서 Android관련 프로젝트)
protected override void OnCreate(Bundle savedInstanceState)
{
    base.OnCreate(savedInstanceState);

    Xamarin.Essentials.Platform.Init(this, savedInstanceState);
    global::Xamarin.Forms.Forms.Init(this, savedInstanceState);
    LoadApplication(new App());


    _CreateNotificationChannel();
    MessagingCenter.Subscribe<StartTask>(this, "Start", message => {
        Log.Info("Service","Service Start!!" + message.ToString());
        var intent = new Intent(this, typeof(CountService));

        StartService(intent);
    });

    MessagingCenter.Subscribe<StartTask>(this, "Stop".ToString(), message => {
        Log.Info("Service", "Service Stop!!" + message.ToString());
        var intent = new Intent(this, typeof(CountService));
        StopService(intent);
    });

}

private void _CreateNotificationChannel()
{
    if (Build.VERSION.SdkInt >= BuildVersionCodes.O)
    {
        NotificationChannel serviceChannel = new NotificationChannel("a", "Alarm Channel", NotificationImportance.Low);
        NotificationManager manager = GetSystemService(Context.NotificationService) as NotificationManager;
        manager.CreateNotificationChannel(serviceChannel);
    }
}
이 코드는 안드로이드 실행할 때 실행되는 코드로 설명을 붙이자면
안드로이드가 실행이 되어 OnCreate가 실행이 되면 _CreateNotificationChanner()을 통해서 백그라운드가 실행을 하기위한 사용자 알림 채널을 먼저 등록해 줍니다. 알림채널의 id는 아무거나 해도 상관없지만 나중에 해당 알림 채널에 접근해야 하니 잘 기억합시다.
그리고 클라이언트가 백그라운드 서비스를 요청한 메시지센터의 메시지를 구독하여 해당 메시지가 넘어오면 StartService에 Service를 상속한 클래스를 넣어 줍니다.
해당 서비스를 종료 할 때도 마찬가지 입니다.
이제 백그라운드에서 실행할 서비스 클래스를 만들어 줍니다. (Service를 상속한 클래스)
[Service]
    class CountService : Service
    {
        Notification notification;
        CancellationTokenSource _cts;
        public override IBinder OnBind(Intent intent)
        {
            return null;
        }

        [return: GeneratedEnum]
        public override StartCommandResult OnStartCommand(Intent intent, [GeneratedEnum] StartCommandFlags flags, int startId)
        {

            _cts = new CancellationTokenSource();


            try
            {
                StartForeground(10000, GetNotification("111111111"));
            }
            catch (Exception ex)
            {

                throw;
            }

            Task.Run(() =>
            {
                var counter = new Counter();
                counter._action = () => {
                    var notification = GetNotification(DateTime.Now.ToString());

                    NotificationManager notificationManager = (NotificationManager)GetSystemService(Context.NotificationService);
                    notificationManager.Notify(10000, notification);

                };
                counter.RunCounter(_cts.Token).Wait();
            });
            //return base.OnStartCommand(intent, flags, startId);
            return StartCommandResult.Sticky;
        }
        Notification GetNotification(string content)
        {
            Intent notificationIntent = new Intent(this, typeof(MainActivity));
            PendingIntent pendingIntent = PendingIntent.GetActivity(this, 0, notificationIntent, 0);
            notification = new Notification.Builder(this, "a")
                .SetContentTitle(content)
                .SetContentText(content)
                .SetSmallIcon(Resource.Drawable.abc_ab_share_pack_mtrl_alpha)
                .SetContentIntent(pendingIntent)
                .Build();
            return notification;
        }

        public override void OnDestroy()
        {
            if (_cts != null)
            {
                _cts.Token.ThrowIfCancellationRequested();

                _cts.Cancel();
            }
            base.OnDestroy();
        }
 }
주의할 점은 Service를 상속하여 OnBind와 OnStartCommand, OnDestory를 오버라이딩 할 수 있는데 이 세가지 메쏘드가 서비스를 실행,중지 할 중요 메쏘드 입니다.
OnStartCommand : 서비스가 실행될 때 호출되는 이벤트
OnDestory : 서비스가 파괴(중지)될 때 호출되는 이벤트
OnStartCommand가 실행이 되면 Notification센터에 해당 백그라운드 작업 내용을 사용자에게 알려야 합니다.
아까 만들어놓은 채널에 노티를 만들어 넣어주면 됩니다. 이 노티피케이션은 작업이 중지 되기전까지 사용자가 종료를 할 수 없습니다.
OnDestory에선 작업의 종료해야 되는데 이런 비동기 작업을 준간에 하기위해서 꼭 Task 작업시 캔슬할 수 있는 토큰을 발급해두고 있다가 꼭 해당 토큰으로 취소해줍시다.
코드는 제가 따로 github에 올려두지 않았지만 필요하시면 요청해 주시면 제가 github에 해당 코드 공유해 놓겠습니다.
감사합니다.
'[개발] 이야기 > [DotNet] 이야기' 카테고리의 다른 글
| blazor server iis에 배포를 했지만 에러가 날 때 (0) | 2021.12.25 |
|---|---|
| Blazor 코드에서 페이지 이동 처리하기 (0) | 2021.12.21 |
| blazor form Submit validation 방법 (0) | 2021.12.19 |
| [blazor] javascript 실행하기 (0) | 2021.12.19 |
| [C# 디자인패턴] Singleton패턴 정복하자(Lazy) - 더이상 암기하지 마세요 (0) | 2021.12.09 |

댓글